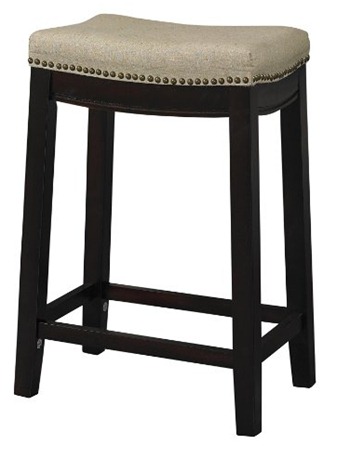
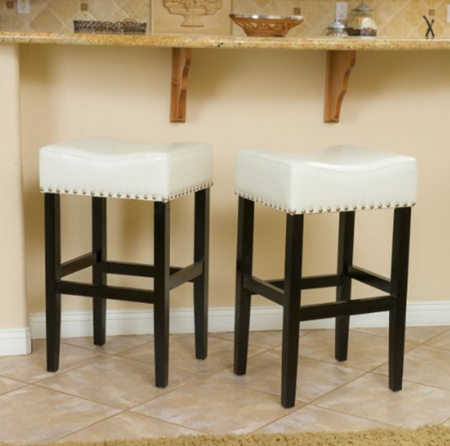
tutsdot.blogspot.com - OK, I lied. I said I wouldn’t be doing anymore posts about the island. But I’ve gotten so many questions about our stools and how I cut them down, I wanted to address it in a post. So this one is technically not about the island…just kinda sorta.
I got these stools from HomeGoods – and I actually found a tag on them that gave me a bit more info, which is rare. I found two of these last summer and then months later found another one…score! I’ve seen that every so often at HomeGoods – I know it can be frustrating when you find out something you love is from there but I’ve found they carry similar items throughout the country and those items often come back. (I’ve seen one of our family room chairs there many times over the years.)
Even though it happens occasionally, I thought it was pretty lucky I found a third! The tags describes them as the “sean barstool dark moon canvas” – if you Google that a bunch of options come up but I didn’t find many with pricing listed. I’m guessing the HomeGoods price was cheaper than what they are going for online, but I’m not sure.
They have a canvas top that’s really easy to clean:
Although I’ll probably go ahead and spray some Scotchguard on them just to be safe.
The canvas look wouldn’t be my first choice, but I loved the the color and the other pretty details like the nailheads:
You’ll notice this guy in any photos of these chairs. HE LOVES THEM. Really, he loves everything and loves to be in photos too. But he’s especially obsessed with the chairs.
I also love that they have a brass metal cover that goes over one foot support so it doesn’t get banged up. (It’s hard to tell but it’s in the front in that pic.)
Many of you mentioned that the stools were too high when I first shared my plan for the island weeks back. For some reason it’s hard for me to find counter-height stools that I like. They’re always bar-height. I found this little graphic that shows you the difference:
(source)
I’ve always cut down my stools because of this and it’s an easy DIY project!
I had already chopped mine so I recreated this for you. ;) First thing, wrap the leg with painter’s tape where you want to cut it. This will allow for a really clean cut:
If you don’t do this you’ll probably get jagged edges on the bottom side, so this is important.
After that you can mark where it needs to be cut. I cut these down by 2.5 inches. I always mark it before I take the stool out to the saw, but then I find that I have to measure and mark again because I’m never quite sure how I’ll lay it on the saw:
Just make sure the stool is up against the back to get a straight cut. You may need someone with you to get it tight. Also, on some cuts I have to lower the saw blade a bit to get the legs to fit in there.
If you don’t have a compound saw, no worries. These miter boxes work just as well:
It will just take more time and muscle. :) Also, you’ll definitely want someone to help you hold the seat end up while you cut if you use the box, or just prop it up so it’s level.
I used a simple miter box and saw just like this for YEARS and did a ton of wood and trim projects with it – and had some great biceps. You can do quite a lot with it!
When you take the tape off you may need to touch up the bottom just a bit – if the chair legs are black or brown you can just use a Sharpie. Mine came out fine so I didn’t need any touch ups. I do always add some felt jobbies to the bottom to protect our floors:
The legs most likely will have something on them already so you can also pry those off and put them on again – these had plastic bottoms so I wanted something softer on the hardwoods.
OH, I forgot to mention – after you cut down all four legs sit on it and see if it rocks. Three of my four did, so I just figured out what legs were just slightly longer and cut them down a bit. Just barely shave it off so you don’t have to keep cutting the rest to make it work! You’ll end up with miniature stools if you keep going. ;)
They are now a much more comfortable height! Our guests still used them before I cut them down and didn’t care. But this allows a little more room for the legs.
I told you he’s obsessed:

That one only comes in the taller version, so if you have a regular island you’d need to cut those down.
And this one has a fabric top and comes in either the bar or counter height, so no cutting down needed:
 This is our second set of wood stools at this island that I’ve cut down – it’s super easy to do, especially if you have a saw! Hope that answers any questions, let me know if not!
Affiliate links included for your convenience!
other source : http://wikipedia.org, http://thriftydecorchick.blogspot.com, http://lintas.me


0 Response to "The Right Island Stool"
Post a Comment